


Shrimp, with its sweet and tender flesh, is a delightful complement to the rich, briny flavor of squid ink pasta. To enhance this pairing, it’s crucial to properly prepare and season the shrimp. This ensures that the natural flavors meld seamlessly with the distinct taste of the pasta.
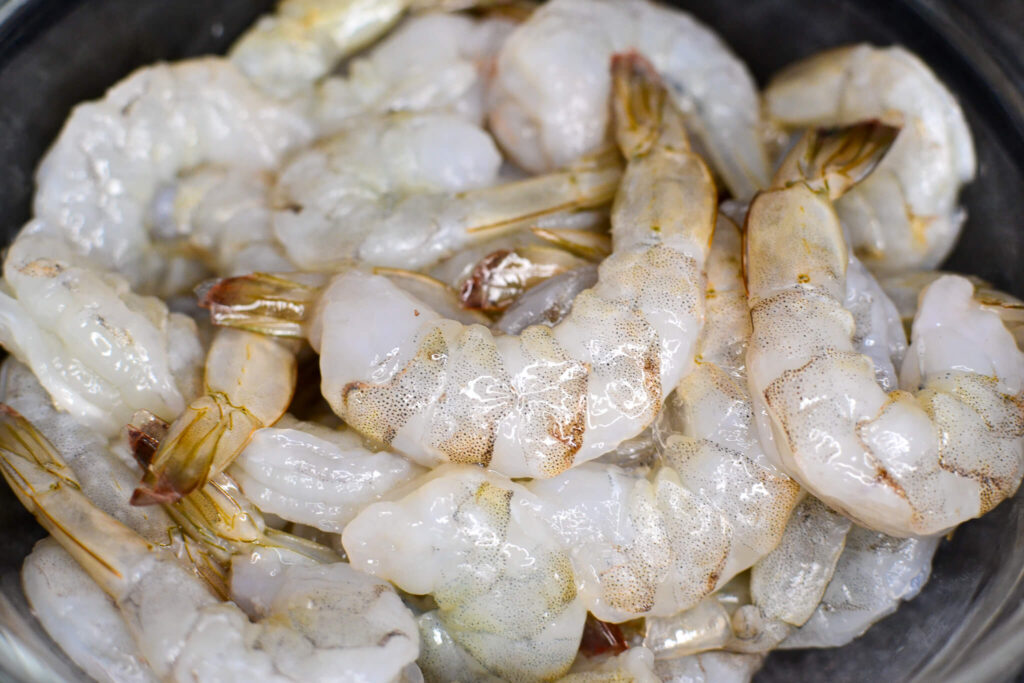
The first step in preparing shrimp is washing. Upon purchasing fresh or frozen shrimp, it’s common to find them coated in a slimy layer, which is simply a natural excretion. Begin by placing the shrimp in a large bowl of cold water, gently swishing them around to remove any superficial dirt or debris. You can also add a pinch of salt to the water to help draw out impurities.
After a few minutes, drain the water and rinse the shrimp under cold running water. It’s essential to use cold water to preserve the shrimp’s texture and prevent any inadvertent cooking.
Peeling shrimp can seem daunting to the uninitiated, but with a little practice, it becomes quite straightforward. Start by holding the shrimp firmly by its tail. Using your other hand, gently pull off the legs which are located along the underside of the shrimp.
Once the legs are removed, you can begin to peel away the thin shell, starting from the head and working down towards the tail. For dishes like our squid ink pasta, it’s recommended to leave the tail on for a more aesthetic presentation. However, if preferred, the tail can be easily pinched and pulled off.
Once the shell is removed, make a shallow slit along the top of the shrimp to devein it. The vein, which is actually the shrimp’s digestive tract, is a dark line running along the back. It’s edible but can have a gritty texture. Using the tip of a knife or even a toothpick, gently lift out the vein and discard.
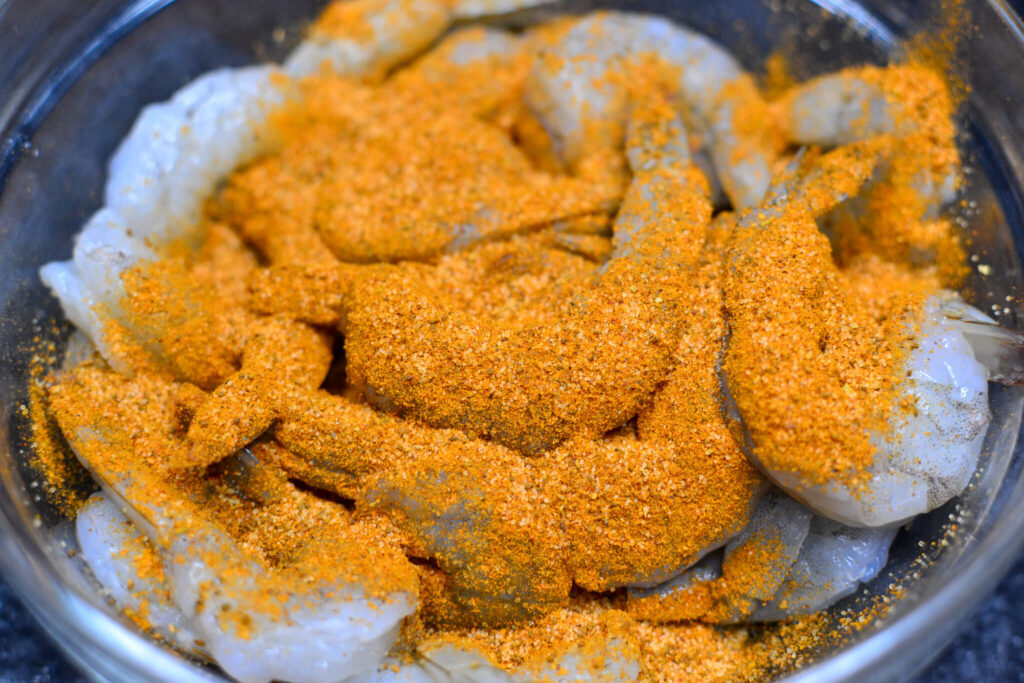
Once cleaned and peeled, the shrimp is ready for seasoning. Given the pronounced flavor of squid ink pasta, it’s wise to keep the seasoning simple. In this case, Old Bay seasoning, renowned for its perfect blend of herbs and spices, is an excellent choice. Its unique combination will accentuate the shrimp’s natural sweetness and pair harmoniously with the squid ink pasta’s deep flavors. Sprinkle the shrimp generously with Old Bay, ensuring they are evenly coated.
This is a very similar approach to the Iceberg Lettuce Salad, too.
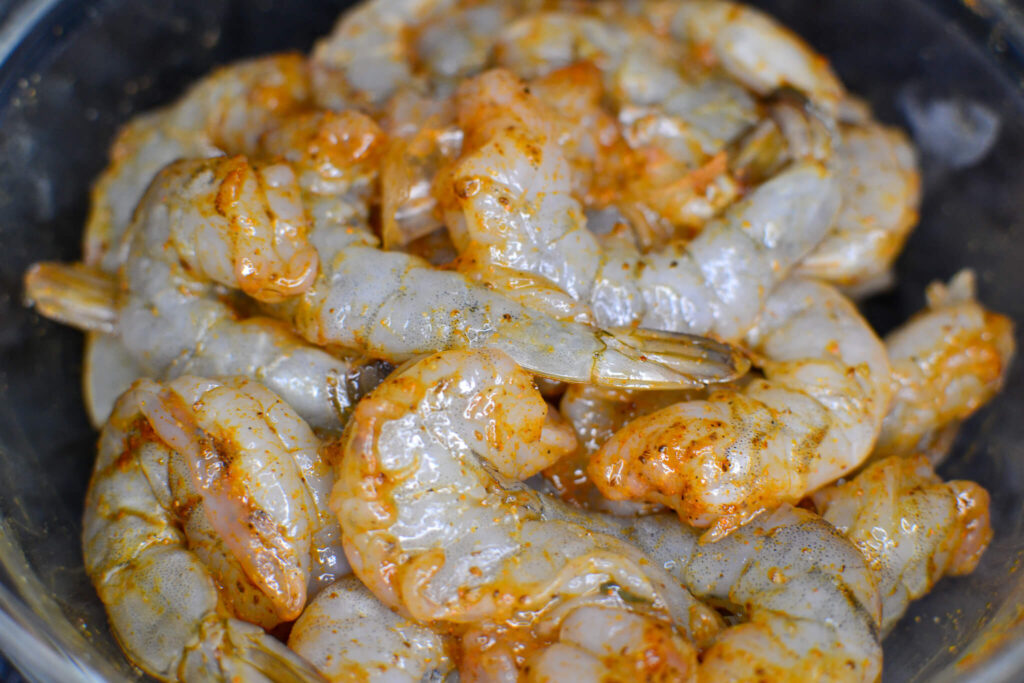
Let them sit for about 10-15 minutes, allowing the seasoning to permeate the shrimp before cooking.
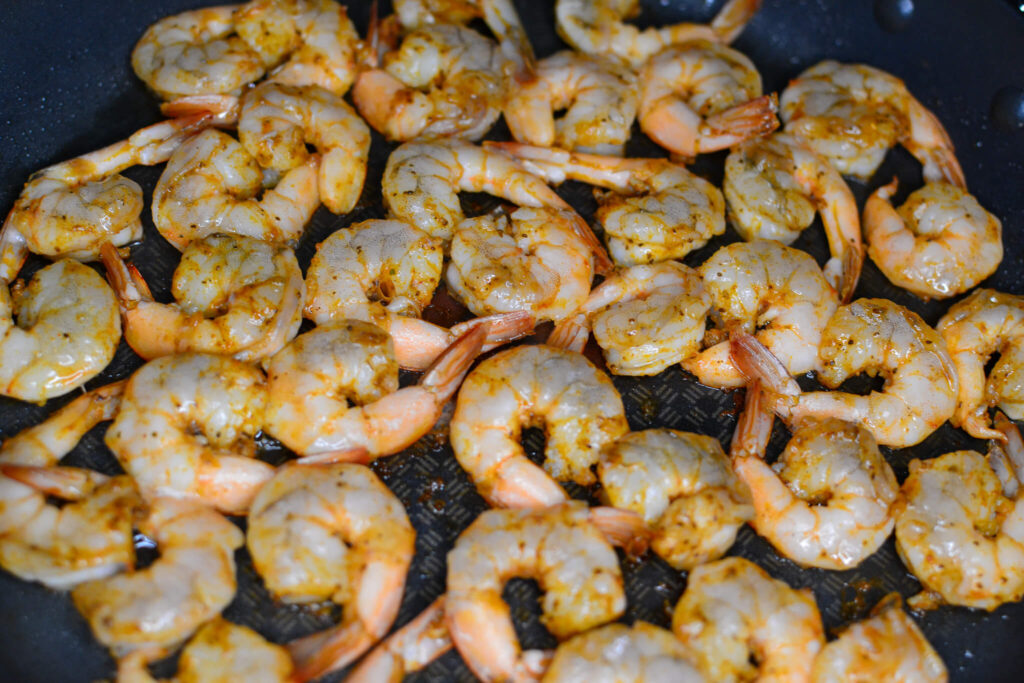
Cooking shrimp is a swift process, requiring a keen eye to prevent overcooking. Begin by heating a skillet over medium-high heat. Add a touch of olive oil or unsalted butter. Once the fat is shimmering and hot, carefully lay the shrimp in a single layer, ensuring they don’t overlap. Cook the shrimp for about 1-2 minutes on one side until they start to turn pink and slightly curl. Flip them over and cook for another 1-2 minutes. They should be pink, opaque, and firm to the touch when fully cooked. It’s crucial not to overcook shrimp as they can become rubbery and lose their succulent texture. Once done, remove them from the heat immediately.
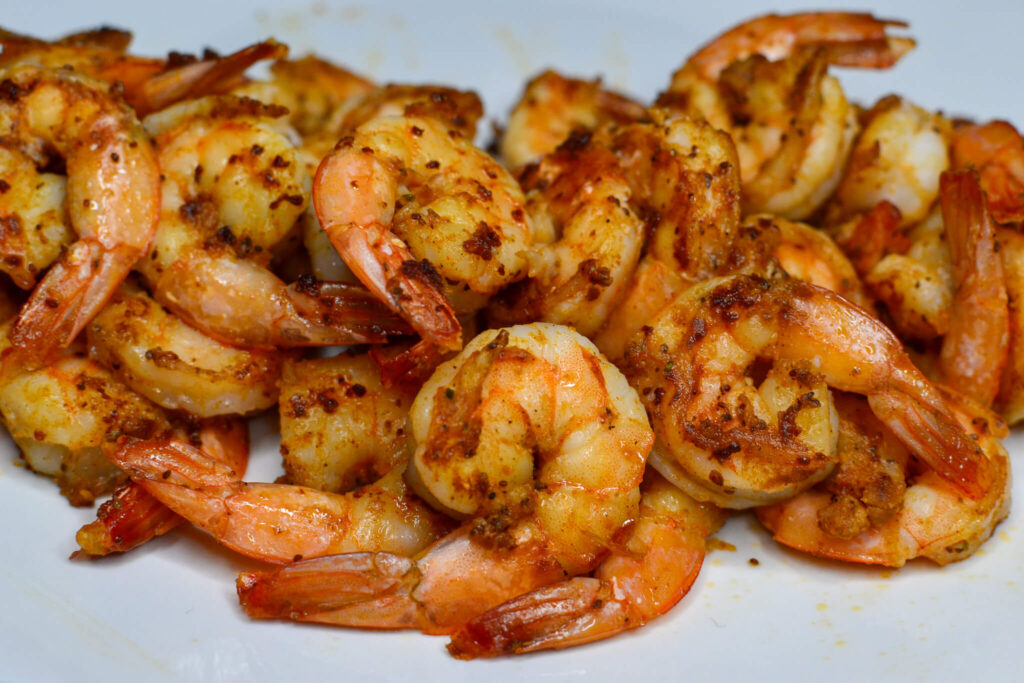
Once done, remove them from the heat immediately. Set aside to add to the squid ink pasta later.
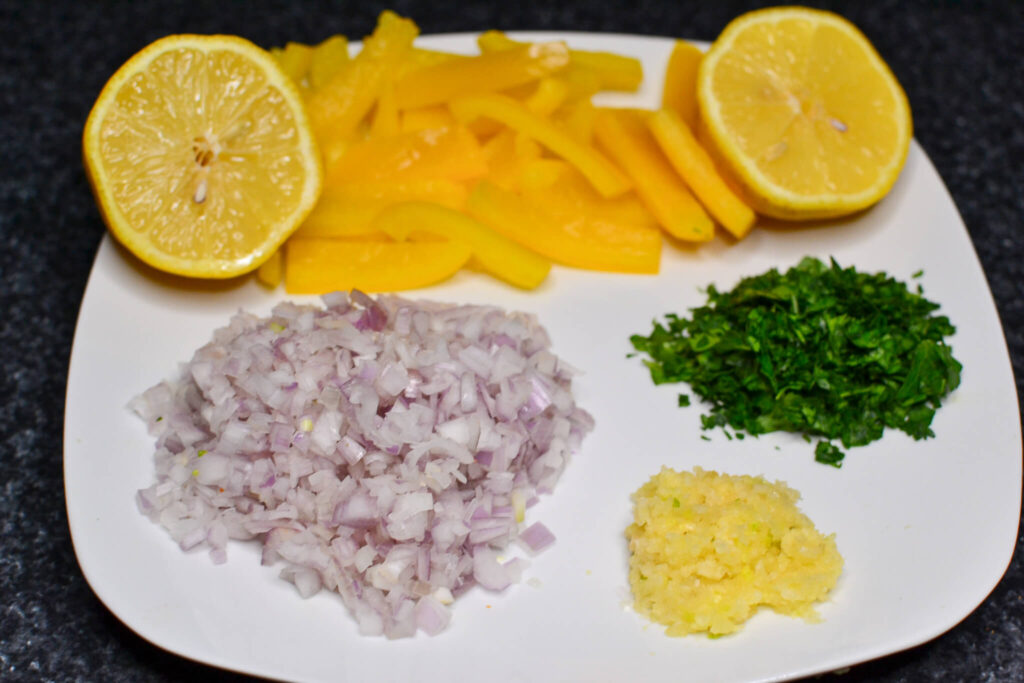
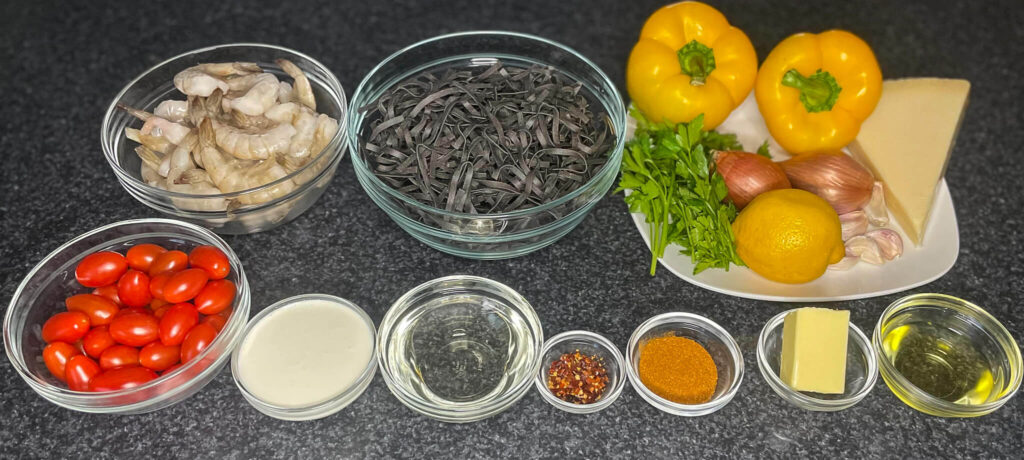
Start by prepping your ingredients. Finely dice the shallots and yellow peppers, mince the garlic, halve or quarter the cherry tomatoes based on their size (or just leave them whole), zest and juice the lemon, and finely chop the parsley. Having everything ready ensures that you can add the ingredients in quick succession, essential for a sauce where timing can affect the final taste.
Sauté them gently to allow them to soften and release their natural sweetness without excessive browning.
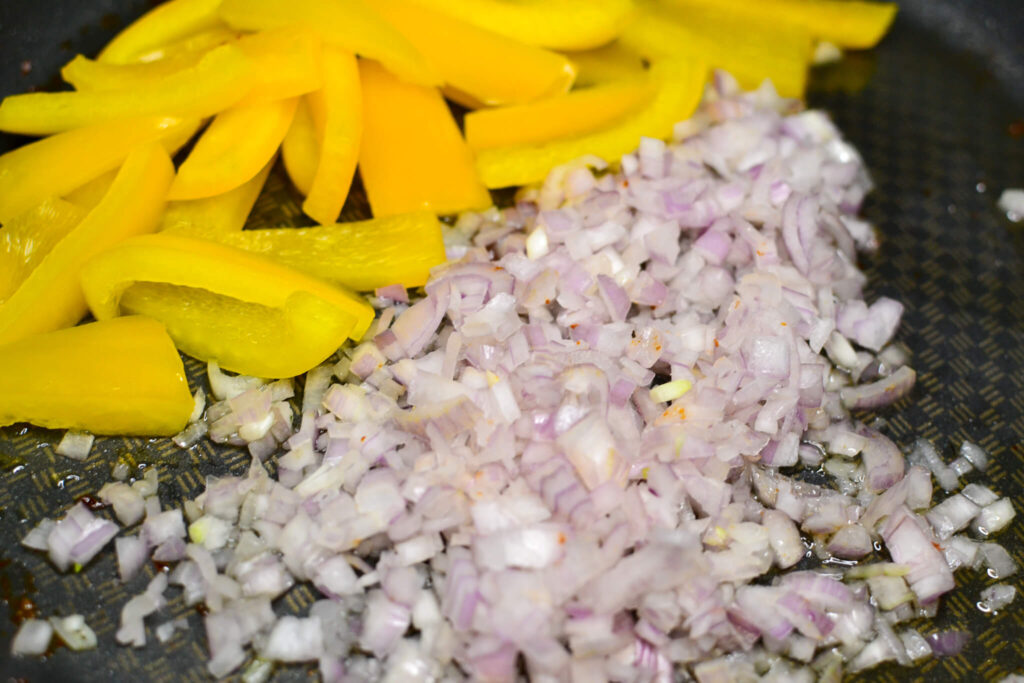
When the shallots and peppers reach their desired tenderness, it’s time to add the halved cherry tomatoes. As they soften, they’ll release their vibrant juices, deepening the color of the sauce.
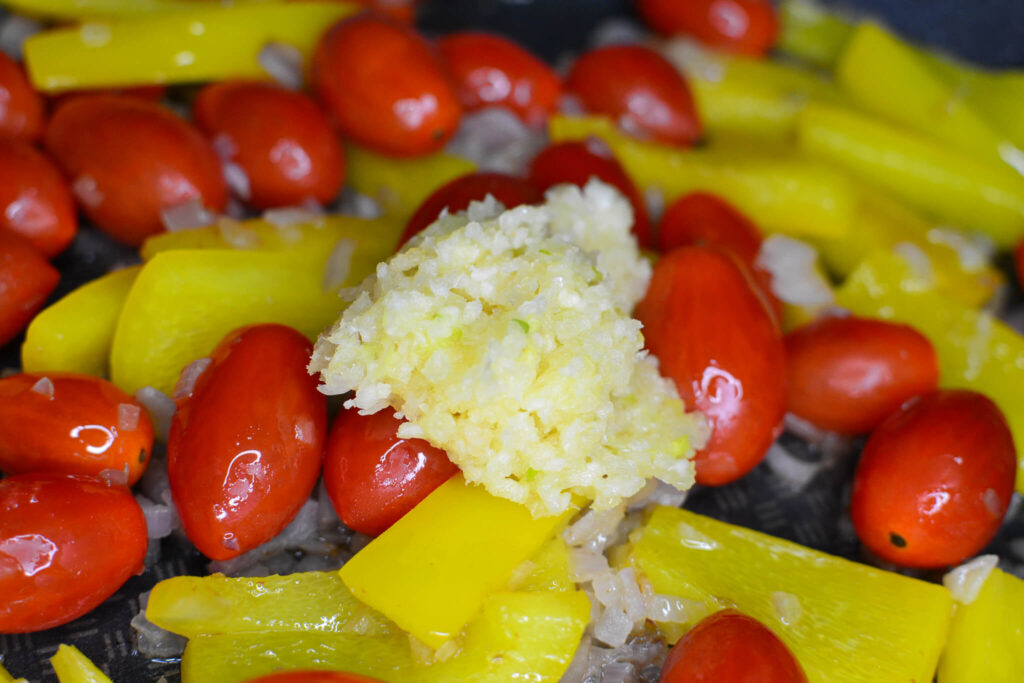
Following the tomatoes, incorporate finely minced garlic. It’s essential to add garlic after the other vegetables to prevent it from burning. The intermingling aromas of garlic with the sweet base will be intoxicating.
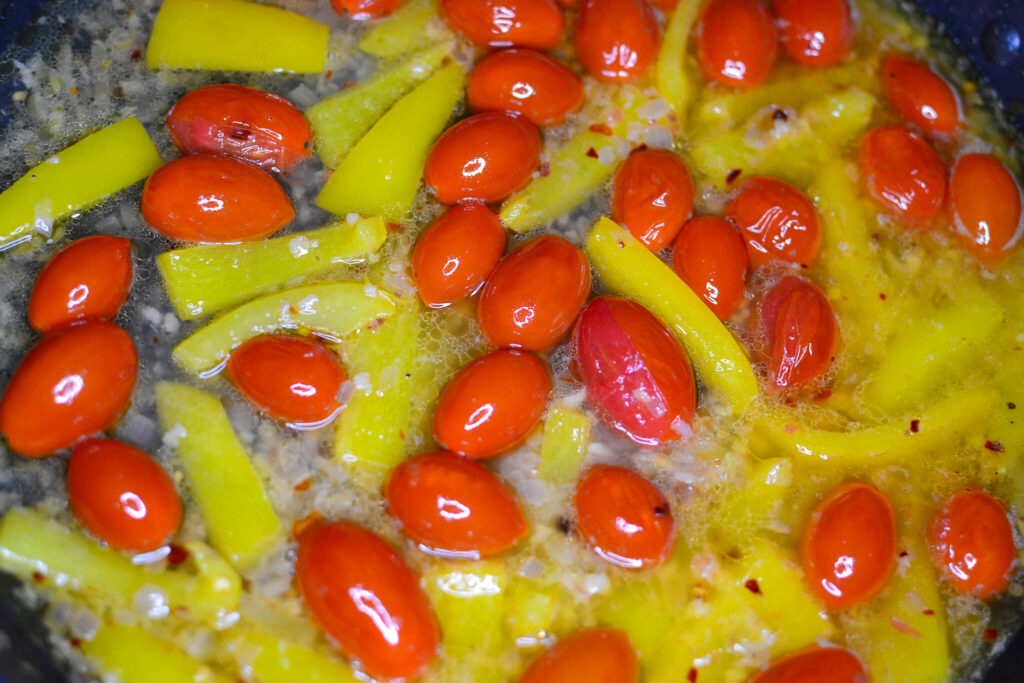
With the base vegetables harmoniously integrated, pour in a splash of white wine. This addition will not only deglaze the pan, lifting the caramelized bits, but also add depth and acidity to the sauce. As the wine reduces, introduce knobs of butter, allowing them to melt into the sauce and impart a silky texture. Season the mixture with salt, pepper, and a hint of red chili flakes to add a touch of warmth.
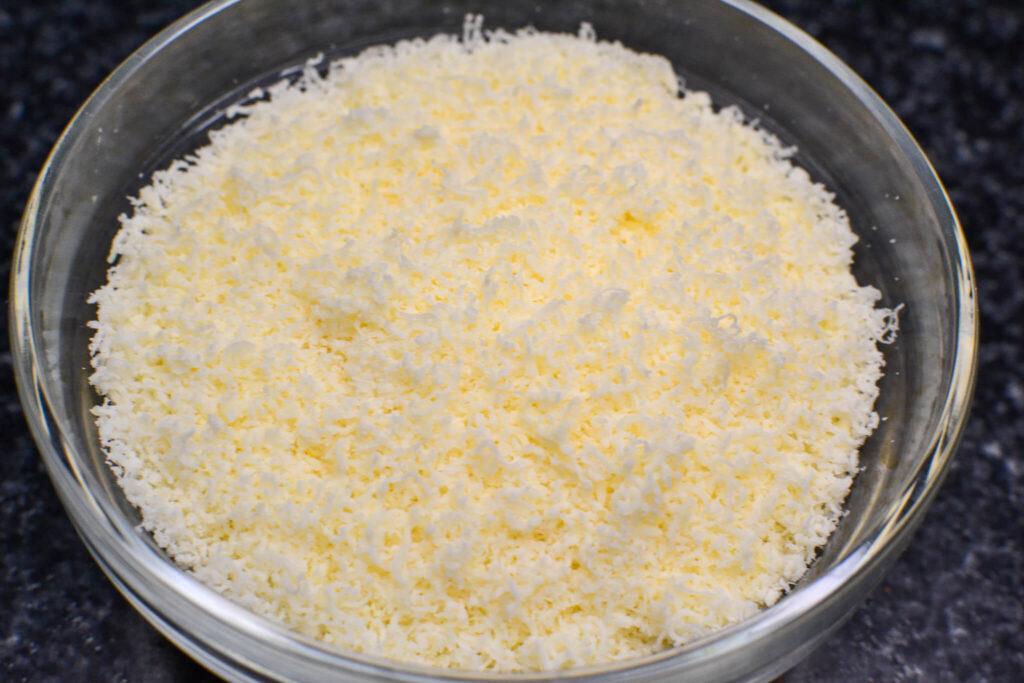
Parmesan cheese, renowned for its hard texture and rich, nutty flavor, is a staple in many kitchens, particularly for Italian dishes. When used fresh and shredded directly from the block, its flavor and texture elevate any dish, offering an authenticity that pre-packaged alternatives often lack.
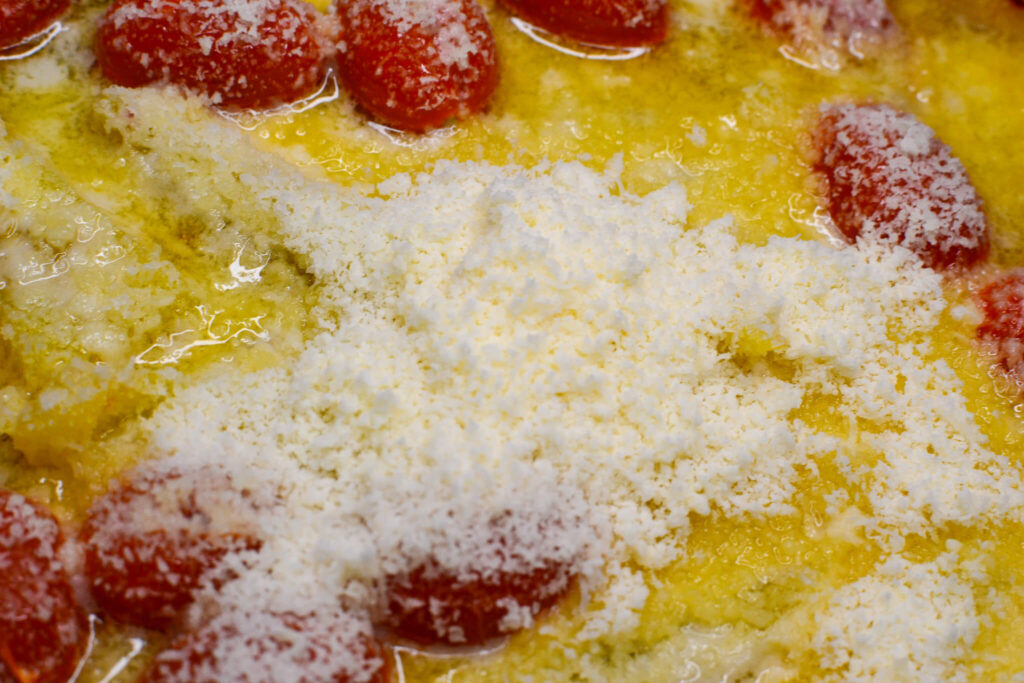
Once the mixture is well-simmered and the flavors are concentrated, sprinkle in a generous amount of grated Parmesan cheese. As it melts, the sauce will take on a velvety texture that elevates its richness.
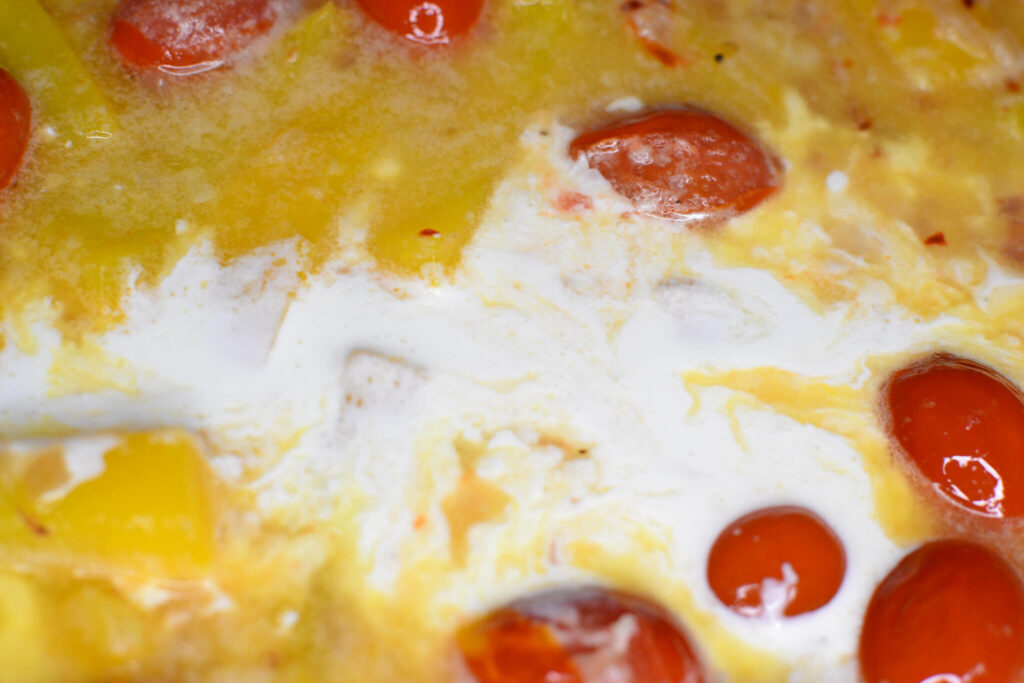
To amplify the luxurious feel, slowly drizzle in the cream, stirring continuously until the sauce achieves a thick, indulgent consistency.
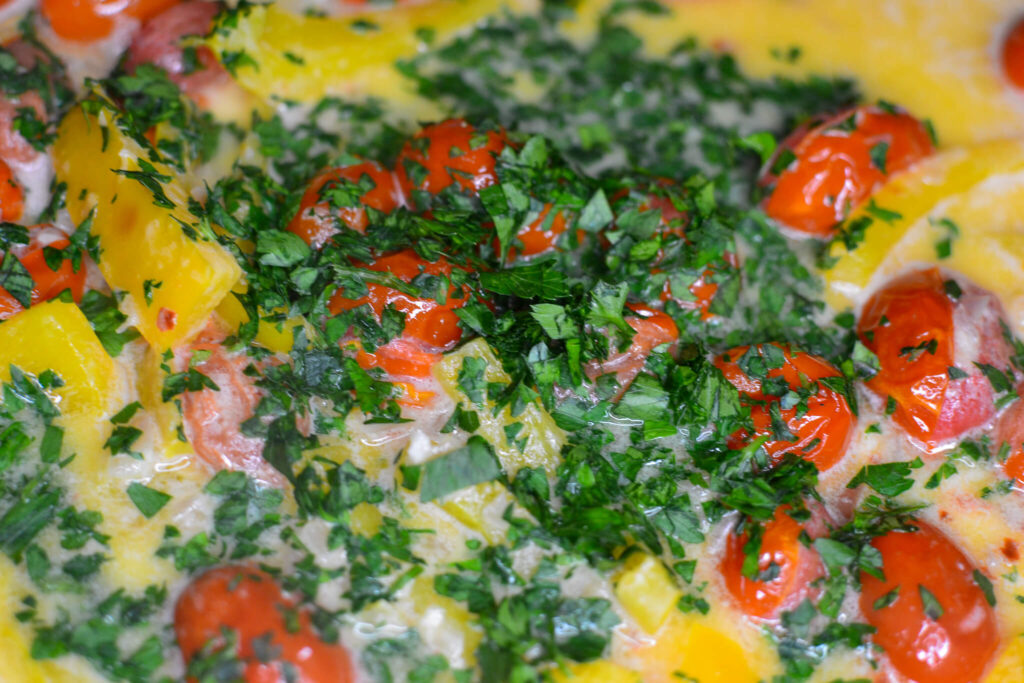
Just before completing the sauce, fold in freshly chopped parsley. This addition not only provides a pop of color against the rich sauce but also offers a fresh, herbaceous note that balances the richness.
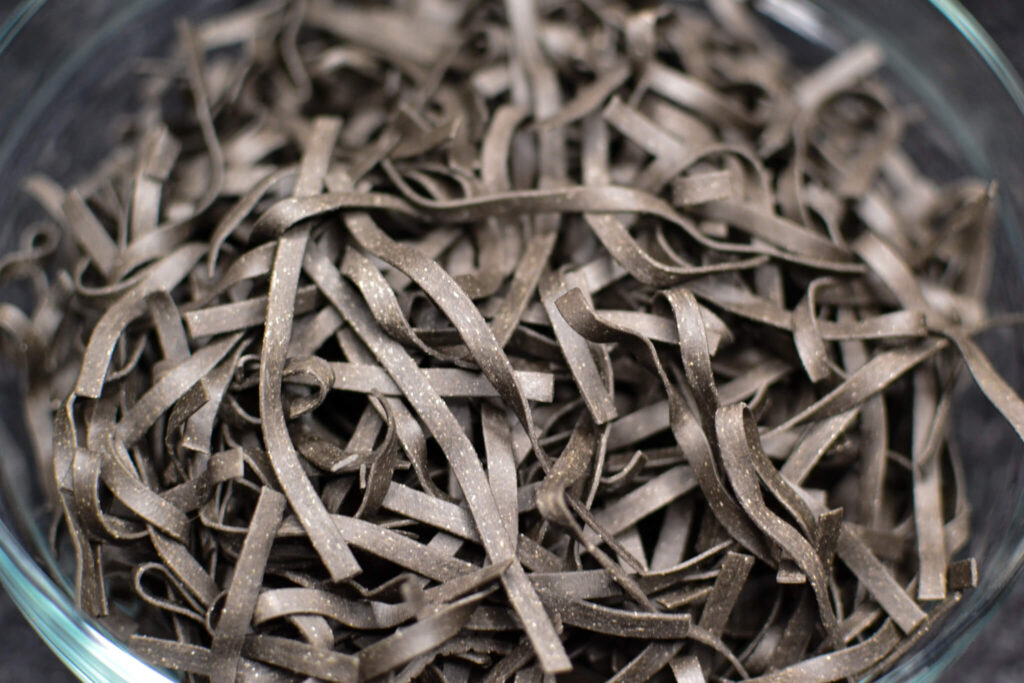
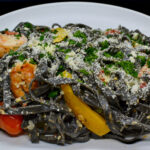
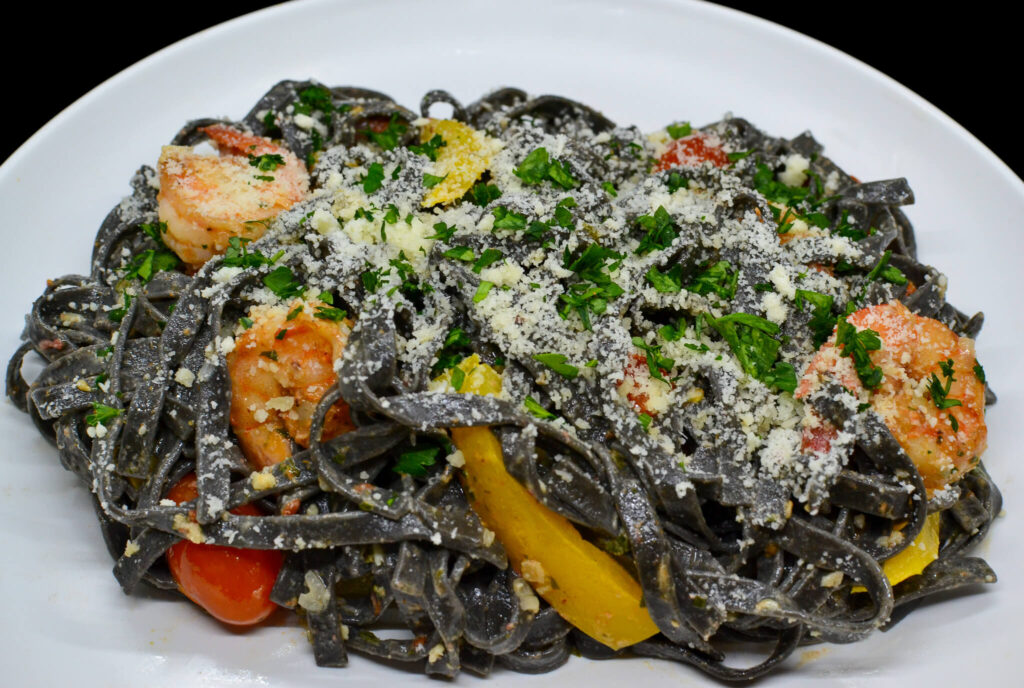
Squid ink pasta, with its arresting, jet-black hue and distinct flavor, stands out not only visually among pasta varieties but also in terms of taste and texture. Originating from Italian coastal regions, this pasta gets its signature color and taste from the ink of the cuttlefish, a close relative of the squid.
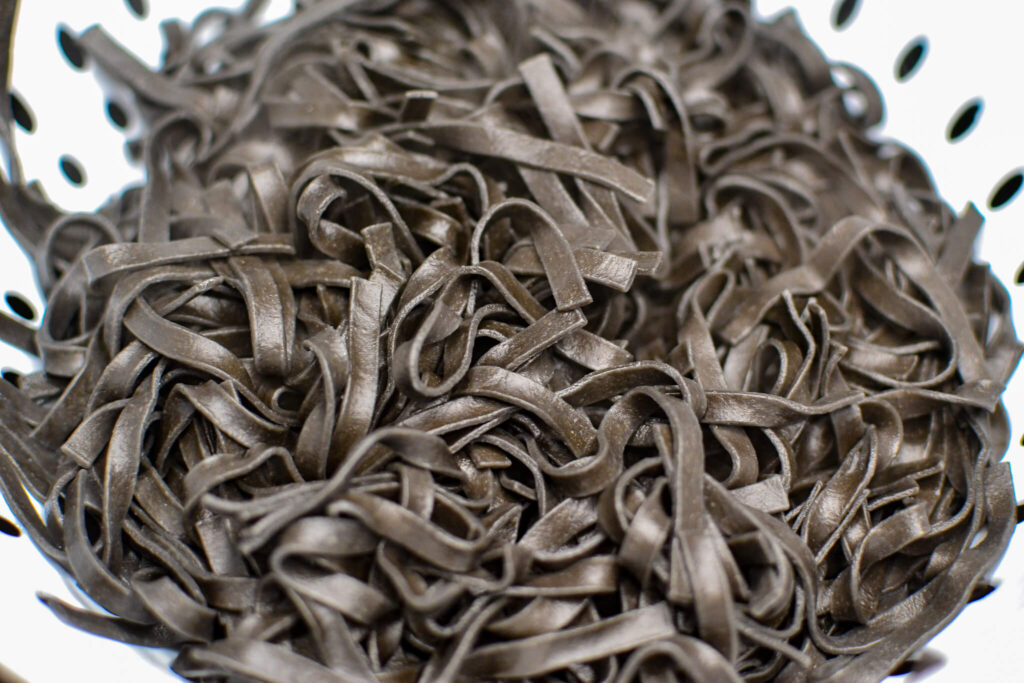
Cooking dried squid ink pasta requires attention, especially given its swift cooking time. Begin by setting a large pot of water to boil. Seasoning the water with a generous pinch of salt not only elevates the pasta’s inherent flavor but also ensures even seasoning throughout.
Once the water reaches a rolling boil, add the pasta, stirring occasionally to prevent any sticking. With such a rapid cooking time, it’s crucial to remain attentive. After about three minutes, or once the pasta reaches an ‘al dente’ texture – tender but with a slight bite – drain it immediately.
For this squid ink pasta recipe, I used Al Dente Squid Ink Fettucine
A quick tip: reserving a cup of pasta water can be beneficial if you need to adjust the consistency of your sauce later.
Squid ink pasta’s flavor profile is notably different from traditional pasta. It possesses a subtle brininess reminiscent of the sea, combined with an underlying savory depth. This oceanic undertone isn’t overpowering, but it’s distinct enough to set it apart from its pasta counterparts. Texturally, squid ink pasta often feels silkier, with its smooth surface being ideal for clinging to sauces.
When compared to regular pasta, the taste difference is clear. While traditional pasta serves primarily as a canvas for the sauce, allowing the latter to shine, squid ink pasta contributes its own pronounced character to the dish. It’s a collaboration of flavors rather than a backdrop.
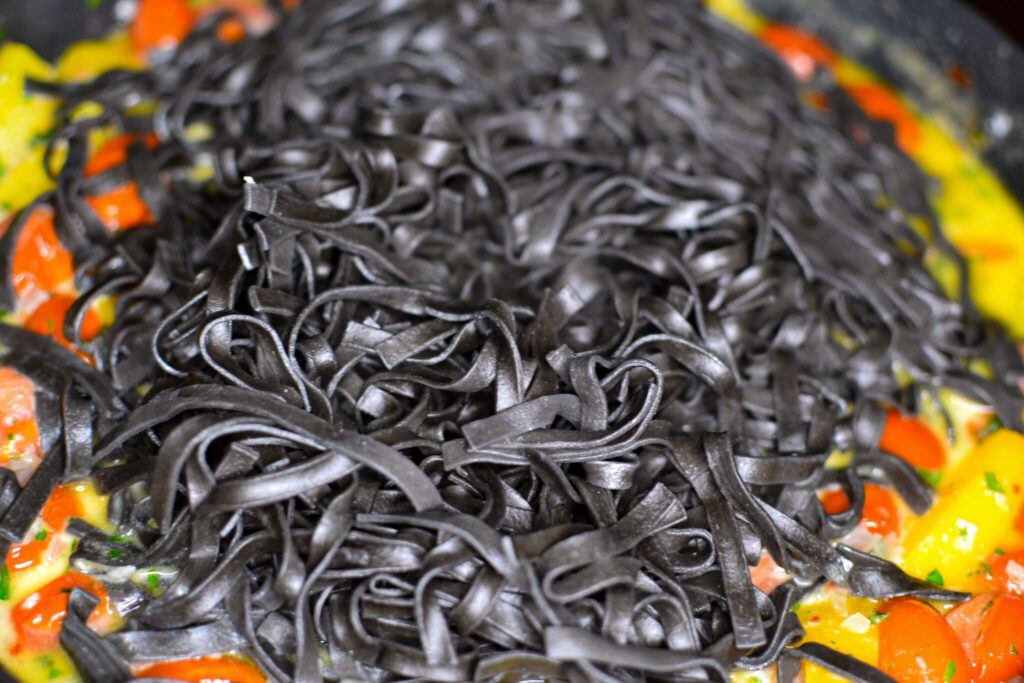
Combining squid ink pasta with its accompanying sauce and shrimp is the final, yet crucial, step in crafting a dish that truly sings. Once the pasta has been drained after its brief three-minute sojourn in boiling water, it’s essential to retain a cup of the pasta water. This starchy water acts as a culinary secret weapon; it helps to marry the sauce and pasta together, ensuring the silky strands are perfectly enveloped in the flavorful blend.
To start the amalgamation, return the saucepan containing the shallot-pepper-tomato-cream sauce to a low heat. Gently fold in the cooked squid ink pasta, ensuring each strand gets a generous coating. If the sauce feels too thick or isn’t clinging to the pasta as desired, slowly drizzle in the reserved pasta water, a tablespoon at a time, until the desired consistency is reached. The starches in the water not only help to thin out the sauce if needed but also create a glossy finish that enhances the visual appeal of the dish.
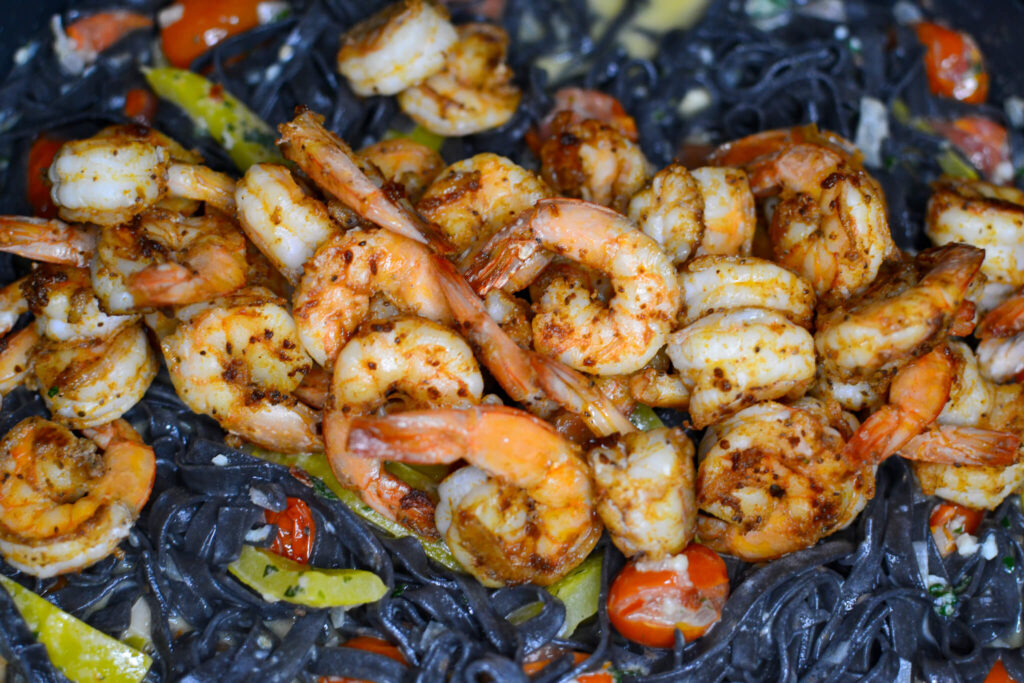
Once the pasta and sauce are harmoniously combined, nestle the previously seasoned and set-aside shrimp into the mixture. The residual heat will warm the shrimp through without overcooking them, preserving their tender succulence. A gentle toss ensures the shrimp are well-distributed throughout the pasta, offering a delightful seafood bite with every forkful. The final dish is a medley of textures and flavors, where the brininess of the squid ink pasta beautifully complements the richness of the sauce and the sweet succulence of the shrimp.
Garnish with some additional parmesan cheese and parsley and dig in.
Enjoy!


The Alien Ink