


First, we’re going to make homemade biscuits. Yes, from scratch…I promise it’s not that intimating.
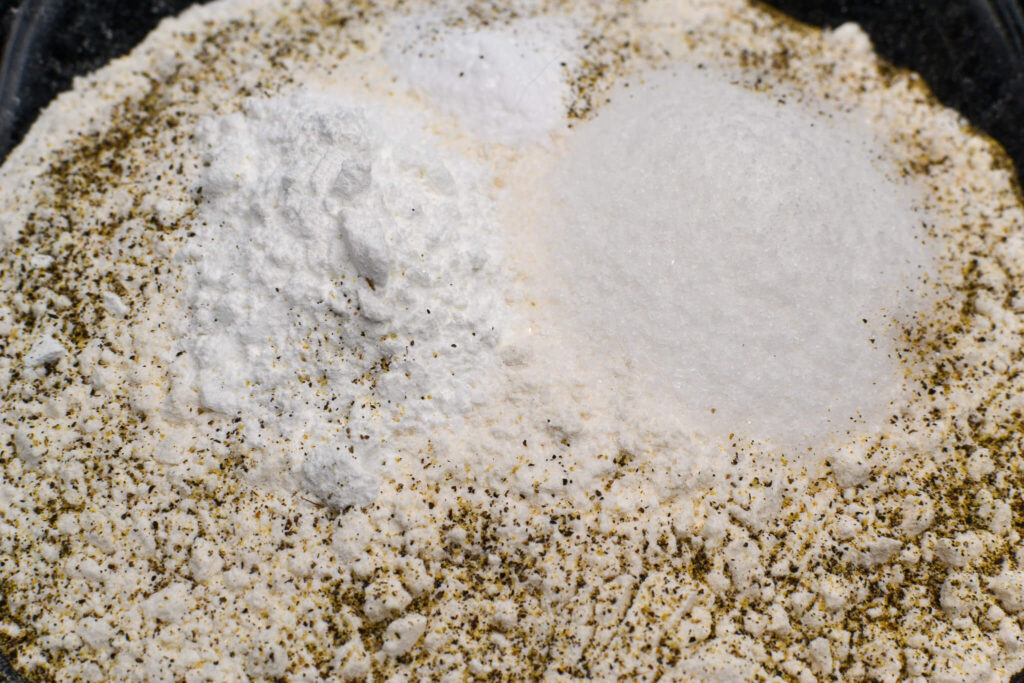
In a large bowl, combine:
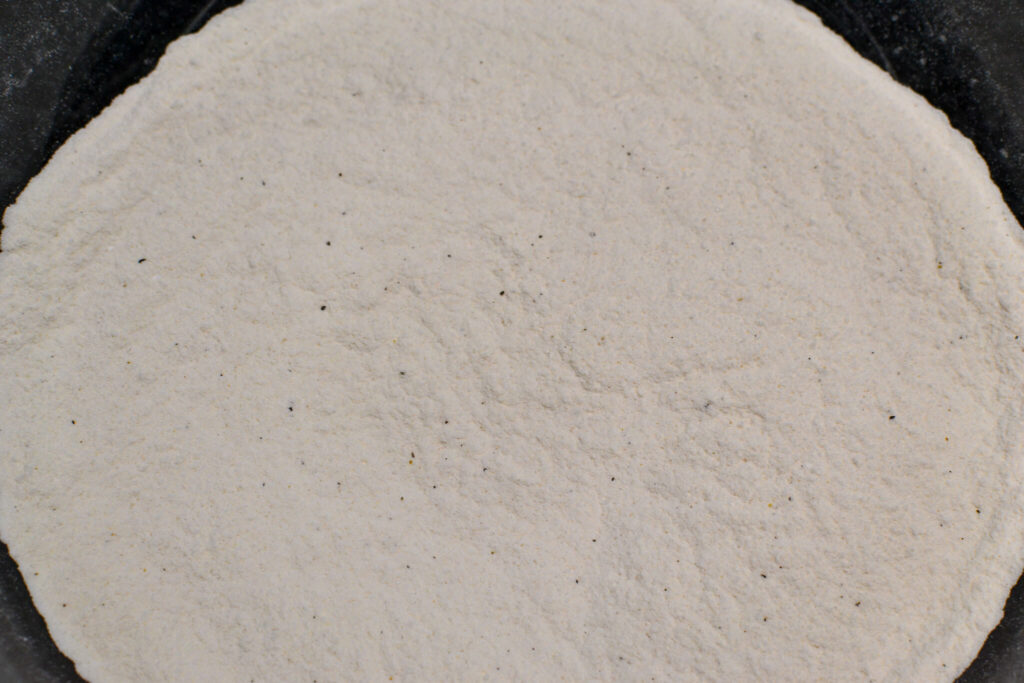
Thoroughly whisk the dry ingredients to ensure an even distribution of these ingredients throughout your mixture, guaranteeing a uniform flavor and texture in each biscuit. Without this step, you risk inconsistencies with some biscuits possibly having an excess of leavening agents like baking powder and baking soda, leading to a variable density across the biscuits.
The process also serves to break up any lumps, especially those formed by baking powder or baking soda, which can otherwise lead to unpleasant flavor pockets in the final product. Lastly, a well-blended dry mix integrates more uniformly into the wet ingredients, contributing to a more consistent and satisfying biscuit. Neglecting this fundamental step could compromise the quality of your biscuits and the overall culinary experience.
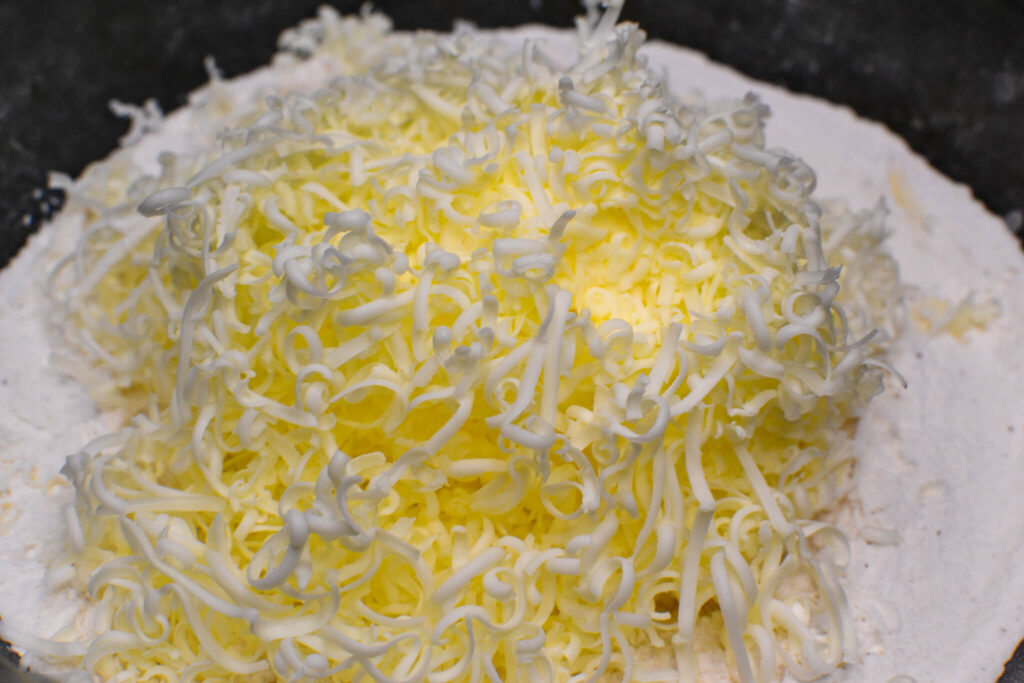
Once you’ve thoroughly whiskey, add 1 stick of frozen or cold butter.
In biscuit making, shredding a frozen stick of butter into the flour mixture brings a significant advantage, primarily contributing to the flakiness and overall texture of the biscuits. The secret to achieving a perfectly flaky biscuit lies in keeping the butter solid until it is baked in the oven. As the biscuits bake, the tiny shreds of frozen butter melt, generating pockets of steam that yield a wonderfully flaky and airy texture.
In addition to this, the shredding technique allows for the butter to be distributed more evenly throughout the dough, thus ensuring a consistent flavor and texture in every bite. It also reduces the need for excessive handling of the dough, which can result in tougher biscuits.
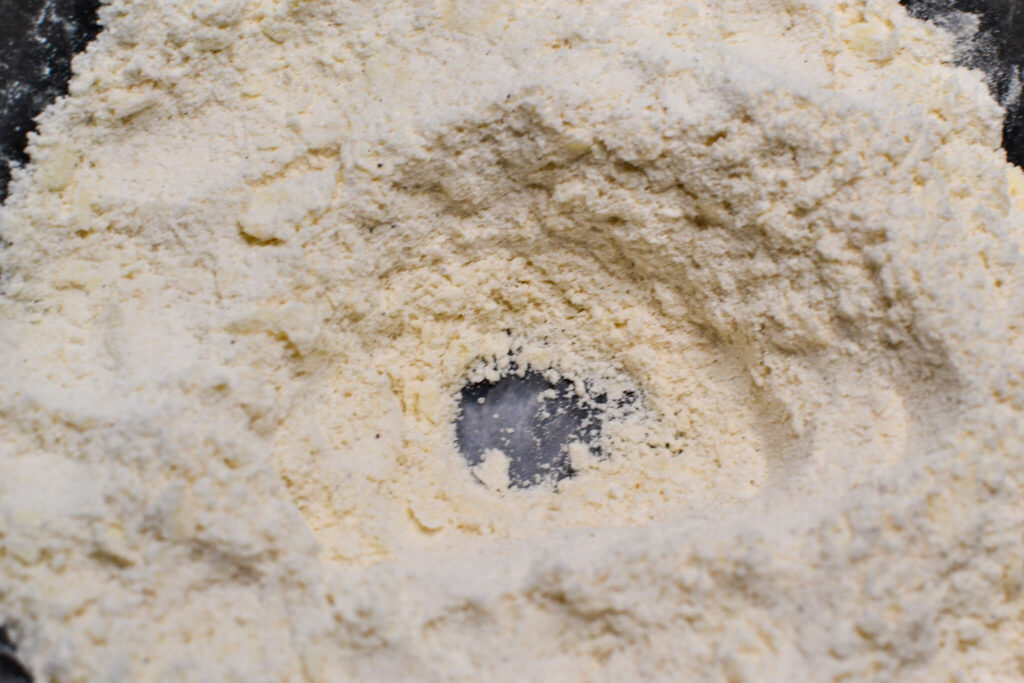
Once you’ve removed all of the little clumps of better within the dry mixture, it’s time to make room for the buttermilk. Create a small hole to pour in 3/4 cup of buttermilk.
The act of pouring buttermilk into the center of the flour mixture when making biscuits provides a distinct advantage in the process. By introducing the liquid in this manner, you gain better control over the mixing process, allowing the gradual incorporation of the dry ingredients from the sides. This incremental mixing technique prevents overmixing, a common pitfall in biscuit making that can result in tougher, less tender biscuits. It ensures that the liquid is evenly distributed throughout the flour, enhancing the overall consistency of the dough.
Furthermore, it assists in the formation of a loose dough quickly and effectively, without overworking the gluten in the flour, which contributes to the ideal light, fluffy texture of the biscuits. In essence, pouring the liquid into the middle of the flour mixture facilitates a more controlled and gentle mixing process, which is paramount to achieving perfect, tender biscuits.

The use of buttermilk or whole milk in biscuit recipes significantly influences the resulting flavor, texture, and leavening properties of the biscuits. Buttermilk offers a distinctive tangy, slightly acidic taste that adds depth and richness to the biscuits, balancing the sweetness of any additional ingredients and the butter’s richness. Its acidity also serves to tenderize the gluten in the flour, resulting in softer, more tender biscuits. Furthermore, when buttermilk interacts with baking powder or baking soda, it triggers a chemical reaction that releases carbon dioxide gas, leading to a well-risen, fluffy biscuit.
On the other hand, whole milk, lacking the acidity of buttermilk, results in a less tangy, more neutral-flavored biscuit. While it does not tenderize the gluten in the same way as buttermilk, whole milk’s higher fat content can make biscuits rich and moist. However, since whole milk doesn’t react with leavening agents as buttermilk does, biscuits made with whole milk might not rise as much or be as light. Therefore, the choice between buttermilk and whole milk depends on the desired flavor profile, texture, and rise of the biscuits.
The choice is yours, but I vote buttermilk.
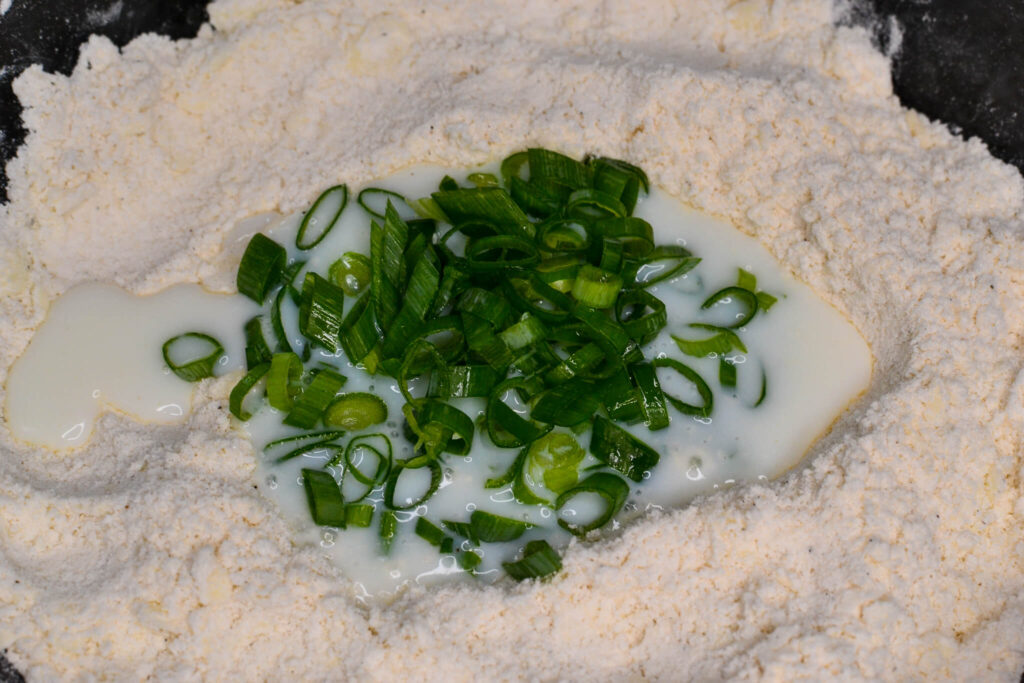
This is an optional step, but at this point would be the addition of 1/2 cup of green onions.
Incorporating green onions into biscuits offers a notable enhancement to both their flavor and aesthetic appeal. Green onions bring a unique, slightly sweet and mildly sharp flavor to the table, adding a savory element that beautifully contrasts the rich, buttery profile of the biscuits.
This additional layer of complexity can elevate the overall taste experience. In terms of texture, finely chopped green onions contribute a subtle crunch, providing a delightful textural contrast to the soft, flaky biscuits. Visually, the bright green hue of the onions introduces a pop of color, making the biscuits more appetizing and appealing

Pouring the liquid into the center of the dry mixture and slowly incorporating it is a method used to better control the hydration of the dough and prevent overmixing.
When the liquid is added all at once over the entire surface of the dry mixture, it can quickly saturate the flour, leading to a potential for overmixing as you try to incorporate all the dry flour into the wet mass. Overmixing stimulates the development of gluten, the protein network in dough, which can result in a tougher texture in the finished biscuits.
By creating a well in the center and pouring the liquid in, you can slowly draw in the flour from the sides to combine with the liquid. This allows the flour to hydrate more evenly and gradually, reducing the risk of overmixing. The goal is to combine the ingredients just until the dough forms, maintaining a tender, flaky texture in the final biscuits.
This method is particularly important in biscuit making, where the aim is usually for a tender, crumbly, and flaky texture, as opposed to bread or pizza dough, where a strong gluten network is desired for a chewy texture.

Combine all the ingredients together until the mixture attains a dough-like consistency, and prepare a space for kneading.
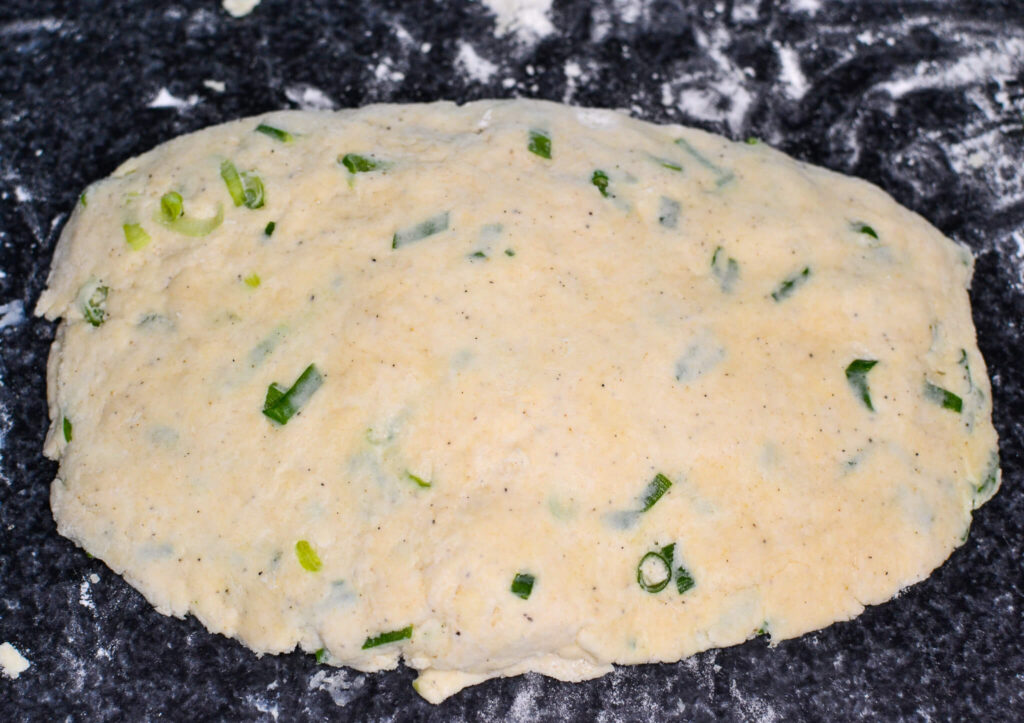
When making biscuits, the kneading process is unique compared to other types of dough, like bread. For biscuits, the key is minimal handling to prevent overworking the dough, which could result in tough, dense biscuits.
Start the process by lightly flouring a clean, flat surface. Then, turn the dough out onto the surface. Using the heels of your hands, gently press the dough down and away from you. Then fold the dough in half toward you, give the dough a quarter turn, and repeat the process.
For biscuits, you typically only want to do this a few times—around 3 to 4 should suffice. The goal here is to bring the dough together and create layers which will help achieve flaky biscuits, but not to develop the gluten extensively, as you would with bread dough.
Once the dough is smooth and cohesive, it is ready to be rolled out (or simply pressed flat if you prefer) and cut into biscuits. This minimal kneading process helps ensure that your biscuits are tender and flaky, rather than tough and chewy.

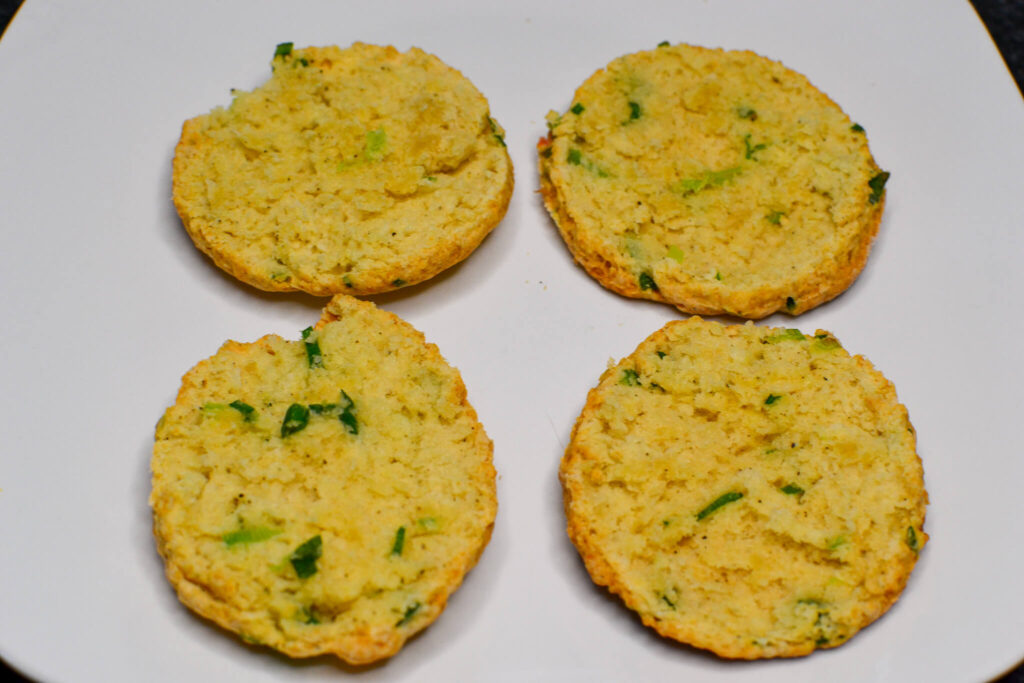
After kneading the dough about four times, take a cup or biscuit cutter and form four circles in the dough to shape your biscuits.
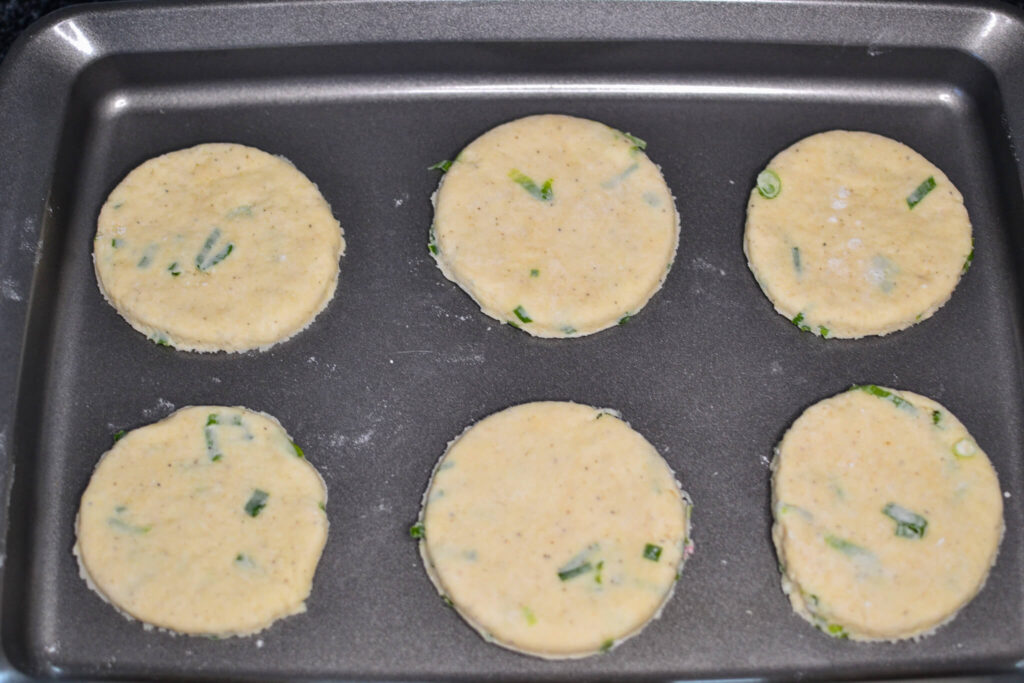
Arrange the biscuits on a baking sheet and bake in an oven preheated to 400 degrees Fahrenheit for 12 to 15 minutes, or until they reach a golden brown color.
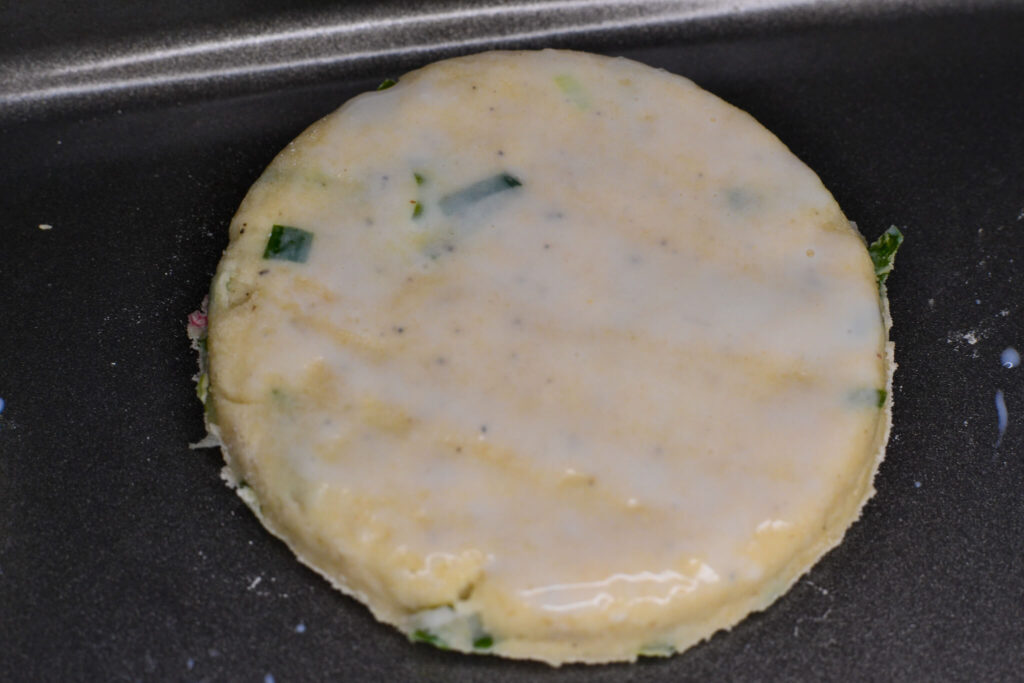
Prior to putting the biscuits in the oven, lightly coat them with additional buttermilk. This step will contribute to a flavorful and crispy outer layer on the biscuits.
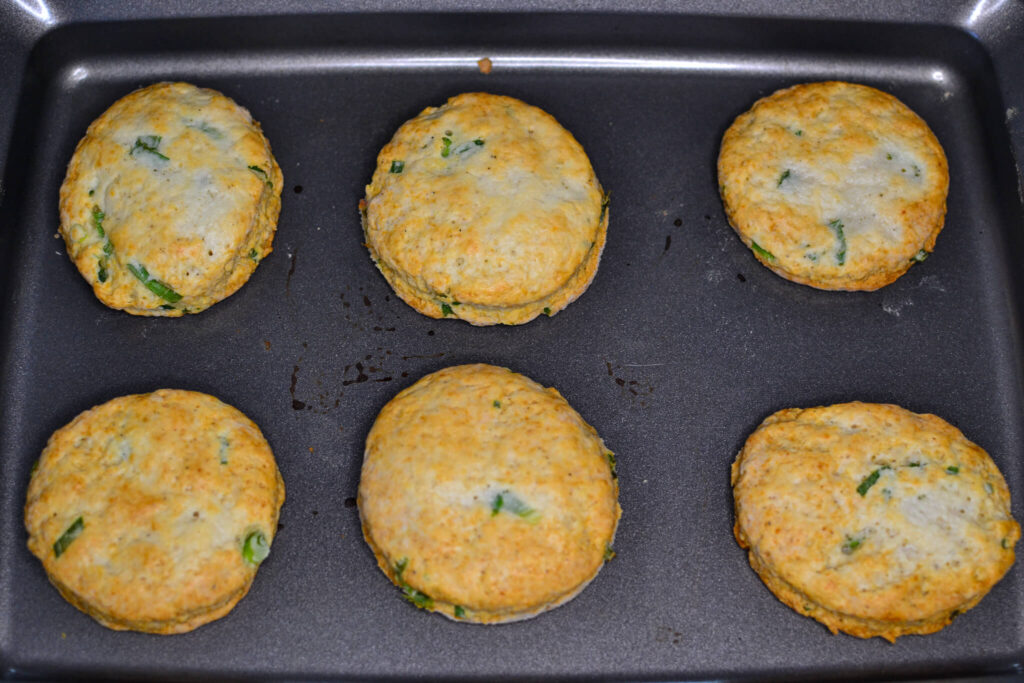
While the biscuits are ideally expected to be light and fluffy, don’t be disheartened if they aren’t. Their flavor will still be delightful, particularly when smothered in chorizo gravy.
Traditional biscuits and gravy is a beloved dish that typically features a simple gravy made from ground sausage, milk, and flour. However, substituting the usual sausage with chorizo can add a modern, creative twist to this classic recipe.
Chorizo, a type of sausage that’s well-seasoned with a variety of spices, infuses the gravy with a deeper, robust flavor profile. This adds complexity to the dish, making it more than just a comforting, hearty meal. It turns it into a culinary experience that marries tradition with innovation.
The chorizo’s rich, spicy, and slightly tangy taste can elevate the gravy, offering a delightful contrast to the flaky, buttery biscuits. This creative substitution brings a touch of modernity to the timeless biscuits and gravy, creating a unique dish that’s both familiar and new.
Chorizo can sometimes be difficult to find in a local grocery store. I used Johnsonville Chorizo Ground Sausage, it worked just fine.
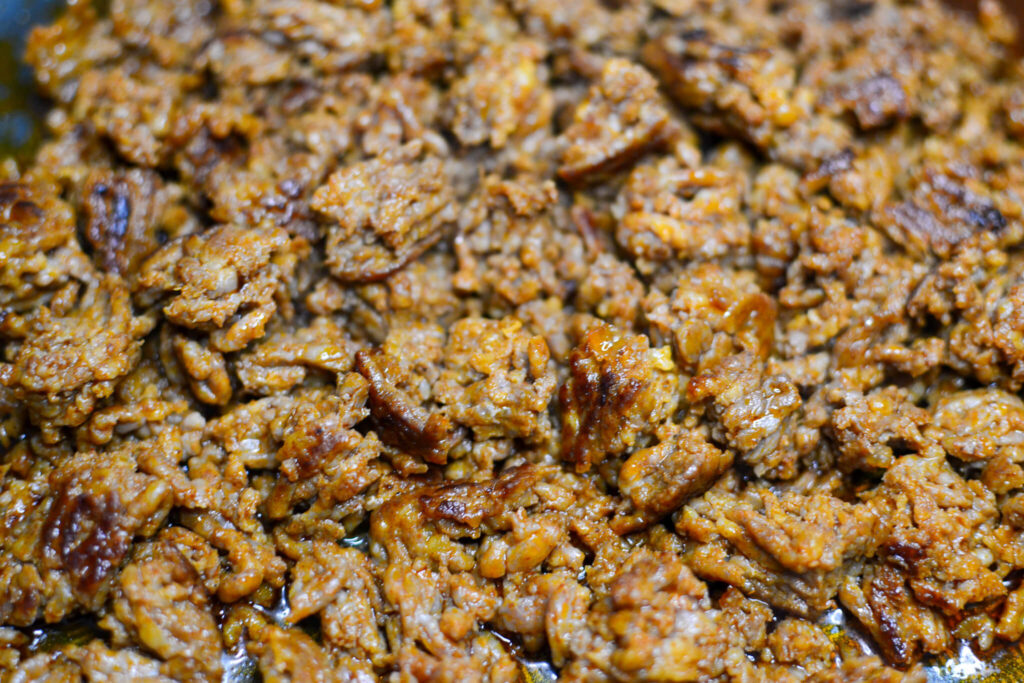
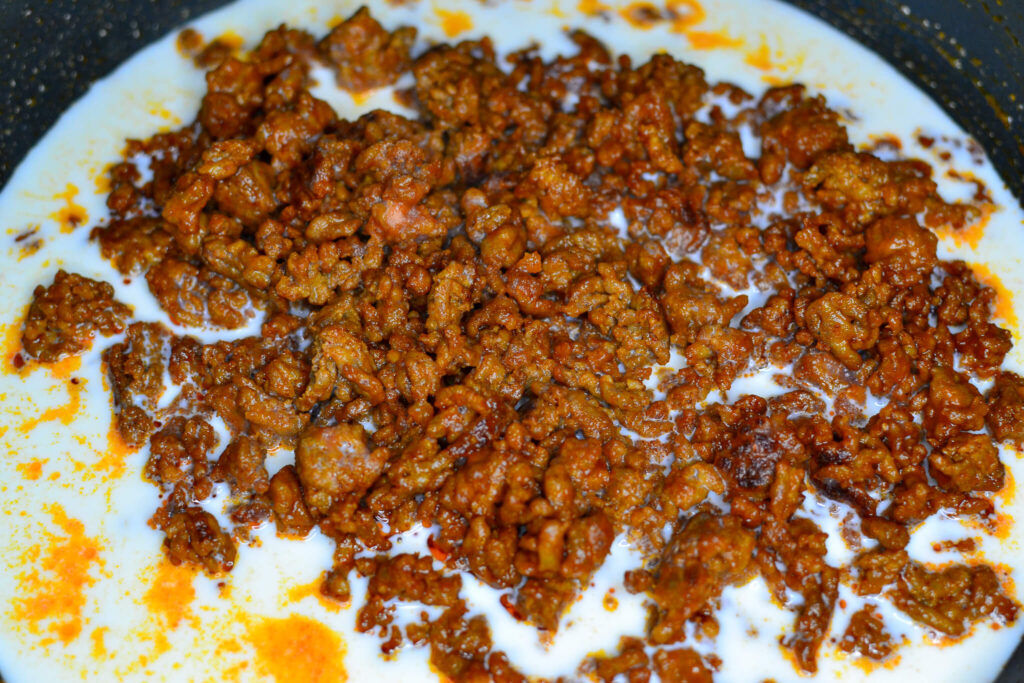
Cook on the stovetop for 10-15 minutes on medium heat.
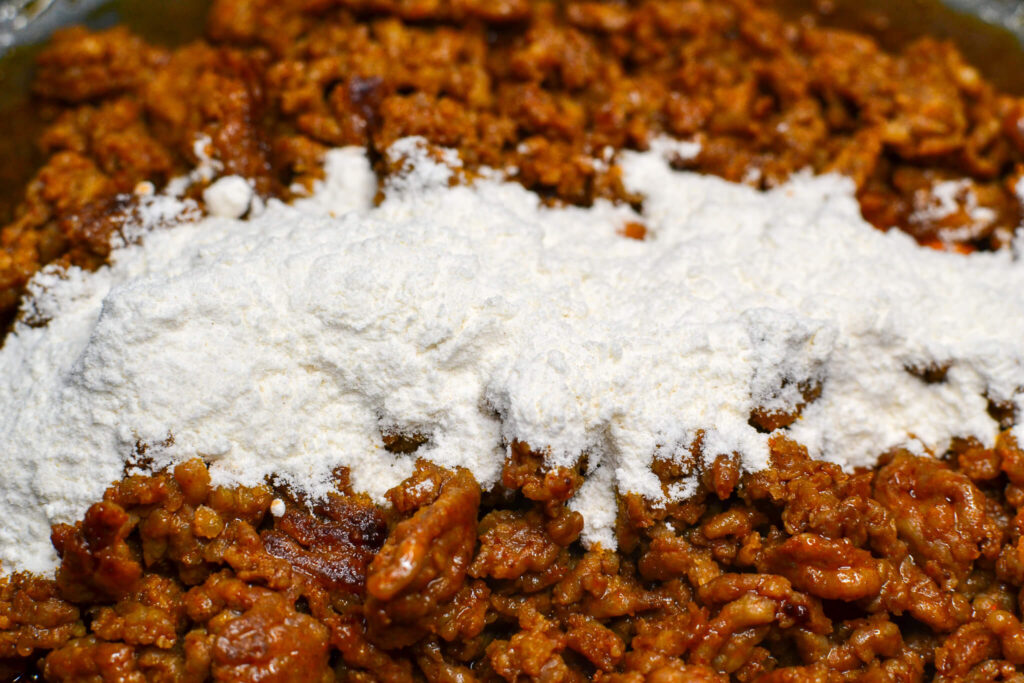
Adding flour to cooked chorizo is indeed the first step in creating a flavorful gravy. This process is known as making a roux, which will serve as the thickening base for the gravy.
Once the chorizo is fully cooked and has rendered its fat, sprinkle 1/4 cup of flour directly into the skillet over the cooked chorizo. The amount of flour should be roughly equal to the amount of fat left in the pan to create a balanced roux. Stir the flour into the fat and cooked chorizo, ensuring it fully absorbs the fat and coats the sausage. The flour needs to cook for a few minutes in the fat to lose its raw flavor, so continue stirring over medium heat until the mixture turns a light golden color.
This mixture of fat and flour will thicken the gravy as it cooks. The roux, combined with the flavor-infused fat from the chorizo, creates a delicious, thick, and creamy base for the gravy. The next step is typically to slowly whisk in a liquid, like milk or broth, to create the gravy itself.
Once the roux is lightly golden and has had a chance to cook off the raw flour taste, you’ll start to slowly add in milk 2.5 cups of milk while continuously stirring or whisking. It’s important to pour the milk in gradually, whisking constantly to ensure the milk gets incorporated smoothly into the roux, preventing any lumps from forming. The roux will begin to absorb the milk, thickening it into a gravy.
You can control the thickness of your gravy by adding more or less milk—more milk for a thinner gravy, less milk for a thicker one. It’s always better to start with less; you can always add more milk if your gravy gets too thick.
Once the milk is fully incorporated, you’ll want to reduce the heat to low and continue to cook the gravy, stirring often, until it reaches your desired consistency. During this time, the gravy will have a chance to absorb all the delicious flavors from the chorizo, creating a rich, creamy, and flavorful gravy perfect for serving over biscuits.
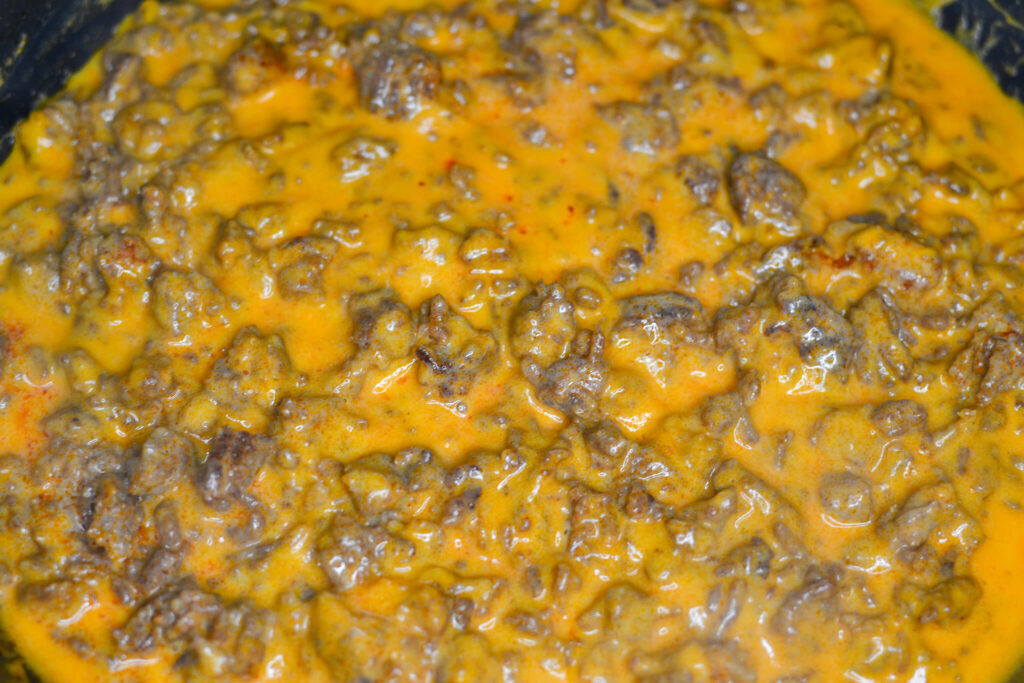
The orange color of the gravy comes primarily from the chorizo. Chorizo is a type of sausage that is heavily seasoned with various spices, one of which is typically paprika. Paprika is a ground spice made from certain varieties of Capsicum annuum peppers, and it has a vibrant red-orange color.
Even though chorizo comes well-seasoned, introducing a bit of additional salt and pepper could be beneficial if you find the gravy needs a flavor boost.
There are primarily two methods to assemble a biscuits and gravy dish, each offering a unique eating experience.
The first option is to leave the biscuits whole and ladle the gravy over the top. This presentation retains the integrity of the biscuit’s form, leading to a visually hearty dish. When the diner cuts into the biscuit, the fluffy interior contrasts beautifully with the creamy exterior coated in gravy. This style ensures the biscuit retains more of its original crusty texture as less of it is in direct contact with the gravy.
Alternatively, you can choose to split the biscuits in half before topping with gravy. This creates an open-faced arrangement and allows the gravy to seep into the soft interior of the biscuit halves, imparting more flavor into the biscuits themselves. The diner gets a mouthful of both biscuit and gravy in every bite, creating a more uniform, gravy-infused flavor experience. This method also offers a different visual appeal, showcasing the fluffy insides of the biscuits soaked in rich, colorful chorizo gravy.
I choose to open them up!
Drizzle the biscuits with the chorizo sausage gravy in your preferred manner, and add a touch of your favorite herbs or greens as a garnish. This not only imparts a hint of herbal flavor, but also introduces a vibrant color contrast to the dish.
Enjoy your chorizo sausage and gravy!


“Eat your biscuits honey, before they get cold.” – Norma Bates